Preserving roses with glycerin is a wonderful way to capture the beauty of fresh blooms and extend their lifespan. In this step-by-step guide, we will walk you through the process of preserving roses using glycerin. Whether you want to cherish a special bouquet or create long-lasting floral decorations, this method will help you achieve stunning results. So, let’s get started!
Unveiling the Essentials
Before embarking on the voyage of rose preservation, it is paramount to assemble all the indispensable materials required for this enchanting endeavor. Below, we enumerate the essential elements you will need:
- Fresh Roses: The cornerstone of your project, the selection of fresh, full-bloom roses in the hue and variety of your preference is of utmost importance. Each distinct rose variety contributes its own unique allure to the preserved masterpiece;
- A Glass Jar: A vessel for preserving the roses, choose a glass jar adorned with a fitting lid or cork stopper. Ensure it offers sufficient space to comfortably accommodate the chosen roses;
- Glycerin Solution: The magical elixir that will bestow longevity upon your roses. Glycerin, the key ingredient, can be easily procured from craft stores or online retailers. It is imperative to acquire an ample quantity to submerge your roses entirely;
- A Pair of Scissors or Pruning Shears: The precision tools essential for the delicate task of trimming the rose stems and rendering them ready for preservation;
- A Small Brush: A diminutive brush shall prove invaluable for delicately sweeping away any blemishes, dirt, or uninvited insects from the roses’ petals, all without causing harm to their fragile beauty.
Now that your arsenal is assembled, we can proceed to unravel the subsequent steps of this enchanting journey.
The Art of Rose Selection
The initial step on this enchanting odyssey revolves around the crucial task of selecting the right roses. Much like handpicking the perfect apples for a delectable pie, the success of your preservation project hinges upon this careful choice. Here are some sage recommendations to assist you in this endeavor:
- Freshness: Opt for roses that exude freshness and are in full bloom. Reject any roses that bear signs of wilting or are already in a withered state;
- Color and Variety: The realm of choices is yours to explore. Whether your heart yearns for the timeless allure of classic red roses or the delicate grace of pink or white blossoms, each rose variety possesses its own unique and captivating charm.
Preparing the Roses for Preservation

With your carefully chosen roses in tow, it is now time to prepare them for their enduring transformation. Follow these meticulous steps to ensure that your roses are in the best possible condition for preservation:
- Gentle Cleansing: Employ a dainty brush to delicately cleanse the petals and leaves of your roses, ridding them of any detritus or unwelcome insect guests. Exercise utmost care to preserve the fragile petals intact during this process;
- Stem Trimming: Armed with a pair of scissors or pruning shears, expertly trim the rose stems at a gentle angle. Leave an ample length to accommodate the roses comfortably within your selected glass jar.
The Preservation Process
Now, let’s dive into the preservation process using glycerin. This step is where the magic happens, as it helps maintain the color and shape of your roses for a long-lasting display.
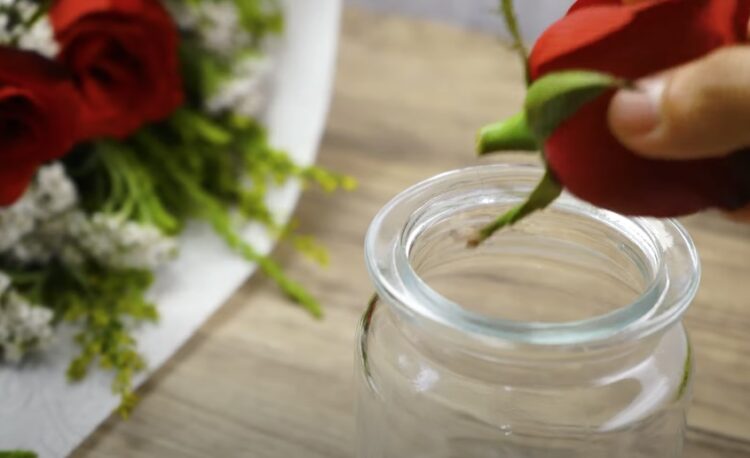
- Fill the glass jar with glycerin solution: Pour enough glycerin solution into the glass jar to submerge the roses completely. You may need to adjust the amount depending on the size of your jar and the number of roses you’re preserving;
- Submerge the roses: Carefully place the cleaned and trimmed roses into the glycerin solution. Ensure that the roses are fully submerged. You can gently press them down if needed;
- Wait for the magic to happen: Allow the roses to soak in the glycerin solution for about 2-6 weeks, depending on the thickness of the rose stems. During this time, the glycerin will be absorbed by the roses, preserving their color and shape;
- Check progress: Periodically check the roses to see how they are doing. You’ll notice that the petals will become pliable, and the glycerin will gradually replace the water in the stems;
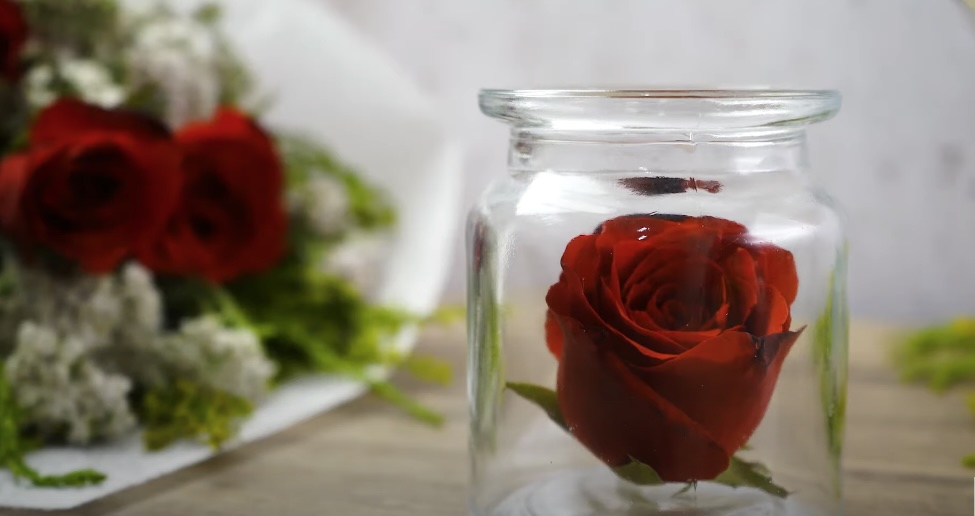
- Remove and display: Once the roses have fully absorbed the glycerin, carefully remove them from the solution. Gently pat them dry with a paper towel and arrange them in a vase or display them in any way you like.
Arranging Roses in the Jar
Arranging roses in a jar is a delightful and creative way to preserve their beauty. Whether you’re crafting a gift or adding a touch of nature to your home decor, this step-by-step guide will help you achieve a stunning result. Just like an artist with a canvas, you’ll be arranging roses to create a visually pleasing display.
Step 1: Gather Your Materials
Before you start arranging roses in a jar, you’ll need to gather the necessary materials:
- A clear glass jar with a lid: Choose a jar of the desired size and shape. It can be a mason jar, a vintage apothecary jar, or any glass container that suits your style;
- Preserved roses: These can be either store-bought or homemade using the preservation method of your choice. Preserved roses come in various colors and sizes, so select the ones that complement your jar and aesthetic;
- Filler material (optional): You may want to add filler material at the base of the jar for added aesthetics. Options include dried moss, small stones, or decorative sand;
- Pruning shears or scissors: These will help you trim the stems of the preserved roses to the desired length.
Step 2: Prepare Your Roses
Inspect your preserved roses and ensure they are clean and free from dust. If needed, gently dust them with a soft brush or a can of compressed air. You can also lightly spritz them with a floral-scented spray to enhance their fragrance.
Step 3: Trim the Rose Stems
Using pruning shears or scissors, trim the stems of the preserved roses to the desired length. The length will depend on the height of your jar and the overall look you want to achieve. Keep in mind that shorter stems are often easier to work with.
Step 4: Arrange the Roses
Now, it’s time to arrange your roses in the jar. This is where your creativity comes into play. Consider the following tips for a visually pleasing display:
- Start by placing one or two roses in the center as focal points;
- Gradually add more roses around the focal points, varying their heights for a dynamic look;
- Mix and match rose colors to create an eye-catching contrast or stick to a single color for a more uniform appearance;
- If you’re using filler material, add it to the base of the jar before placing the roses;
- Pay attention to the spacing and balance of the roses to create a harmonious composition;
- Experiment and adjust until you achieve the desired arrangement.
Step 5: Seal the Jar
Once you’re satisfied with your arrangement, seal the jar tightly with its lid. This is crucial to keep air and moisture out, preserving the roses’ beauty and longevity.
Step 6: Display Your Jar
Choose a spot to display your rose-filled jar where it can be admired but not exposed to direct sunlight or extreme temperatures. A well-lit shelf or a centerpiece on your dining table can be excellent choices.
Maintenance Tips
To ensure your preserved roses continue to look fresh and beautiful, follow these maintenance tips:
- Occasionally dust the exterior of the jar to keep it clean and clear, allowing the roses to shine through;
- Avoid shaking or moving the jar too much, as this can displace the roses and affect their arrangement.
Creative Variations
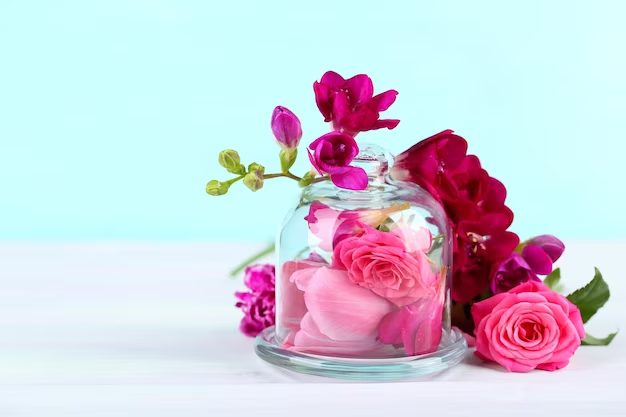
When it comes to arranging roses in a jar, creativity knows no bounds. Here are some creative variations to make your preserved rose display truly unique and enchanting:
- Mix and Match Rose Colors: Experiment with a variety of rose colors to create a visually striking composition. You can opt for contrasting colors or stick to a harmonious color palette, depending on your aesthetic preferences;
- Add Decorative Stones or Pebbles: Enhance the visual appeal of your rose jar by adding decorative stones or pebbles at the base. This not only adds texture but also anchors the roses in place;
- Incorporate Greenery: For a more natural and vibrant look, consider adding some preserved greenery or foliage alongside the roses. This can mimic the appearance of a lush garden in your jar;
- Include Dried Lavender or Baby’s Breath: Complement your roses with dried lavender or baby’s breath for a delicate, ethereal touch. These additions can introduce subtle fragrance and a dreamy atmosphere;
- Tiny LED Lights: To create a magical and enchanting effect, place a tiny LED light or fairy lights inside the jar. This will add a soft, warm glow to your rose arrangement, making it a captivating centerpiece;
- Personalize with Ribbons or Labels: If you’re gifting the rose jar, consider personalizing it with ribbons, labels, or tags. Write a heartfelt message or the occasion’s date for a sentimental touch.
Common Mistakes to Avoid
While arranging roses in a jar can be a delightful creative endeavor, there are some common mistakes to watch out for to ensure your display turns out beautifully:
- Using Wilted or Overly Mature Roses: It’s essential to start with well-preserved roses that are in their prime. Avoid using roses that are wilted, overly mature, or have blemishes, as they won’t look their best in the jar;
- Overcrowding the Jar: Less is often more when it comes to arranging roses in a jar. Overcrowding can make the arrangement look messy and prevent each rose from shining. Give each rose enough space to stand out;
- Neglecting Maintenance: Once your roses are in the jar, occasional maintenance is necessary to keep them looking fresh. Dust the exterior of the jar and check for any signs of deterioration, such as mold or discoloration.
Preserving Roses for Special Occasions
Preserved roses are not only a beautiful decoration but also a way to commemorate special occasions with sentimental value. Here’s how you can incorporate them into your celebrations:
- Anniversaries: Preserved roses can be a thoughtful and enduring gift for anniversaries. You can choose roses from a past anniversary and create a keepsake that will remind you of that special day year after year;
- Milestones: Whether it’s a milestone birthday, graduation, or retirement, preserved roses can symbolize achievements and mark significant life events. Use them as a unique centerpiece or gift to celebrate these moments.
Conclusion
Preserving roses in a jar is more than just a DIY project; it’s an act of cherishing beauty and memories. With these steps, you can create a timeless piece of natural art that brings joy for years to come.
FAQ
Preserved roses can last for years if maintained properly.
Yes, but the process and aesthetic will differ from preserving natural roses.
No, once preserved, roses do not require water.
It’s best to avoid opening the jar to maintain the preservation.
Absolutely! It’s a safe and enjoyable process.